Handle Your Subscription Preferences
Customer.io supports the ability to capture form submissions using our Connected Forms feature. For businesses who have a desire to track multiple subscription types for their customers beyond a "global" unsubscribe, we have a solution for you.
Prerequisites
- A Customer.io account and the Site ID found in your Workspace settings
- A place to host an HTML landing page (Your website, Netlify, etc.)
- A list of subscription current types
- Emails in Rich Text or HTML format using Layouts
- This is possible to achieve in the Drag and Drop format, but this doc is specific to the use of Layouts
Step 1: Define your subscription types
For this implementation to remain easy to manage, it's important to develop a list of the current subscription types, as well as a list of corresponding attributes that will be managed on the landing page. This is the "map" you'll use to control whether people receive one type of message or another.
For example, you might want to give people the option to manage their participation in separate onboarding, education, promotional, and holiday campaigns. You will want to create a set of attributes that correspond to each of those. It may look something like this:
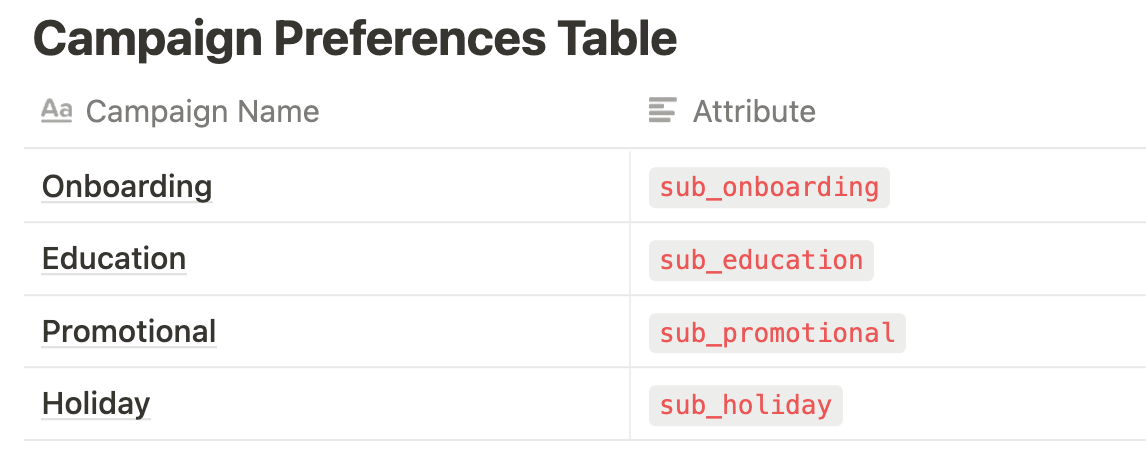
The sub_ prefix on each of the attributes will allow much easier identification of the subscription types in Customer.io, and allow us to programmatically search through all the customer attributes using Liquid.
Once your subscription types and attributes are defined, we can move on to creating the HTML for our landing pages.
Step 2: Create the Landing Page
💡 Our full HTML example is attached to this article. You can download it at the bottom of the post!
In our example, we're using the Bootstrap CSS framework and jQuery for handling form values. You can and should style the HTML page however you like.
Each input field in the form element below requires an id name and value attribute. You will notice that there are inputs and labels for each of our defined subscription types from step two as well as a Global Unsubscribe option that uses our unsubscribed reserved attribute in the id and name attribute for that checkbox.
<form action="/thank-you.html" id="subscriptions">
		<h3>Which topics are you interested in?</h3>
				<div class="form-check">
					<input class="form-check-input" type="checkbox" name="sub_onboarding" value="" id="sub_onboarding">
					<label class="form-check-label" for="sub_onboarding">
						Onboarding
					</label>
				</div>
        <div class="form-check">
					<input class="form-check-input" type="checkbox" name="sub_education" value="" id="sub_education">
					<label class="form-check-label" for="sub_education">
						Education
					</label>
				</div>
        <div class="form-check">
					<input class="form-check-input" type="checkbox" name="sub_promotional" value="" id="sub_promotional">
					<label class="form-check-label" for="sub_promotional">
						Promotional
					</label>
				</div>
        <div class="form-check">
					<input class="form-check-input" type="checkbox" name="sub_holiday" value="" id="sub_holiday">
					<label class="form-check-label" for="sub_holiday">
						Holiday Messages
					</label>
				</div>
				<!-- Global unsubscribe option -->
        <div class="alert alert-secondary mt-3" role="alert">
          <div class="form-check">
            <input class="form-check-input" type="checkbox" name="unsubscribed" value="" id="unsubscribed">
            <label class="form-check-label" for="unsubscribed">
                Unsubscribe me from all marketing.
            </label>
          </div>
        </div>

		<input type="hidden" id="id" name="id" value="">
		<button id="btn" class="btn btn-primary mt-3">Submit</button>
	</form>
The Customer's current subscriptions will be sent from the "Manage Subscriptions" link in the footer of our email, and we'll be getting to that setup shortly. In the meantime, we need some Javascript to help read the current subscriptions that will be included in the link, as well as the customer's ID.
	const queryString = window.location.search;
  const urlParams = new URLSearchParams(queryString);
  const sub = urlParams.get('sub')
  const subs = sub.split(',');
  const cid = urlParams.get('id')

  $( document ).ready(function() {
    if(subs != ""){
        $(subs).each(function(index, element){
            $('#'+element).val('true');
            $('#'+element).prop('checked', true);
        });
    }

    $('#id').val(cid);

    $(".form-check-input[type='checkbox']").change(function(){
        if($(this).is(':checked'))
            $( this ).val('true');
        else
            $( this ).val('');
	  });

	});
Taking the example URL of: https://cio-sub-center.netlify.app/?sub=sub_education,sub_holiday&id=516112 our Javascript takes the list of subscriptions after sub= and turns them into a list. We also take the id parameter and set that as the cid variable. We then use jQuery to set a value of true to each checkbox value attribute where the subscription id matches what came in in the URL.
We also set the hidden id field with the id value that came in the URL. Next, we use jQuery again to set and unset the checkbox value when someone changes their preferences. This ensures we'll be updating the attribute values in Customer.io appropriately.
In our example we've also created a /thank-you.html page to display a confirmation message to visitors once they've submitted the form. That's the URL that we've included in our form action attribute.
Step 3: Set up your Connected Form in Customer.io
Now that your landing page is created, you can connect the form on that page to a new Customer.io Connected Form. You'll need the base URL for the page where your form lives. For example: https://www.abc.com
When you enter that form URL, you'll be presented with a list of fields that we found by scanning the form on the page. They should match what you've include in your HTML and earlier in your subscription types mapping exercise.
Once you confirm the fields are correct and you connect the form, you'll be presented with a new Javascript Snippet that includes your Customer.io Workspace data-site-id — You'll need to edit your landing page to include this snippet for form submissions to be sent to Customer.io.
<script type="text/javascript">
  (function() {
    var t = document.createElement('script'),
        s = document.getElementsByTagName('script')[0];
    t.async = true;
    t.id    = 'cio-forms-handler';
    t.setAttribute('data-site-id', 'YOUR_SITE_ID');
    t.setAttribute('data-base-url', '<https://customerioforms.com>');

    t.src = '<https://customerioforms.com/assets/forms.js>';

    s.parentNode.insertBefore(t, s);
  })();
</script>
Step 4: Set up your Layout to include a Manage Preferences link
At this stage you have a Landing Page URL and a list of attributes that represents your list of subscriptions. We'll need both to create the Manage Preferences link in the footer of your email.
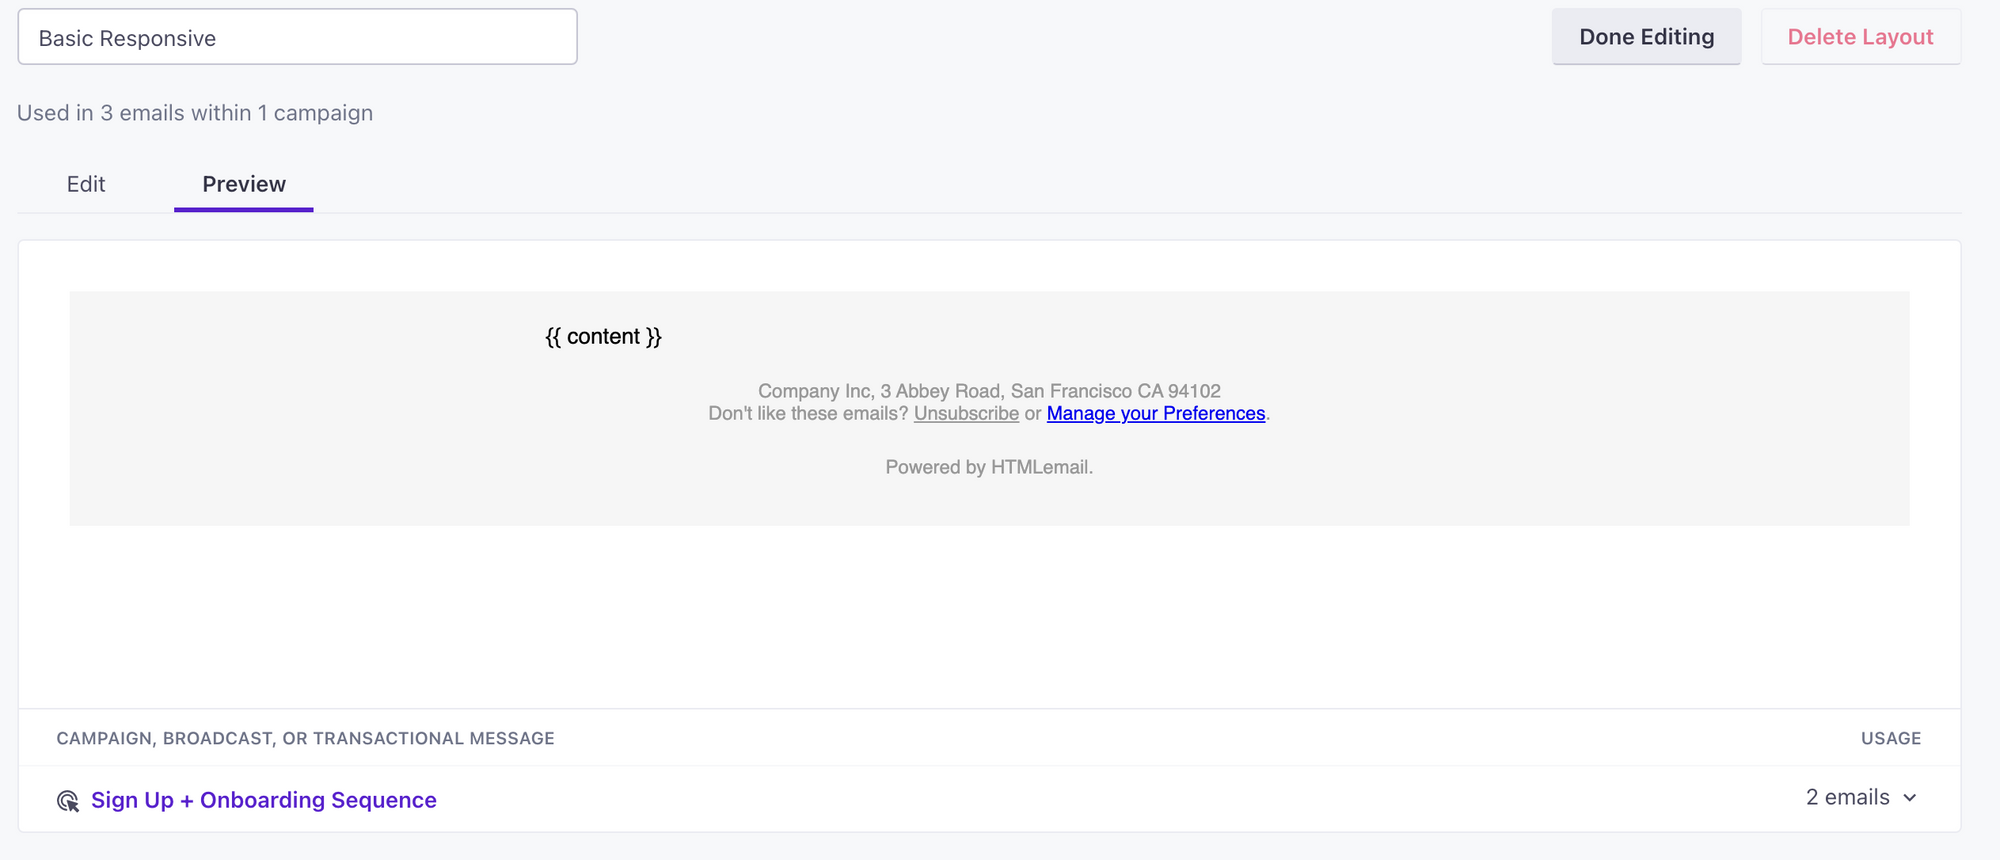
Here's a look at our basic Layout.
In the Edit view, we'll want to add some Liquid to the top of the code:
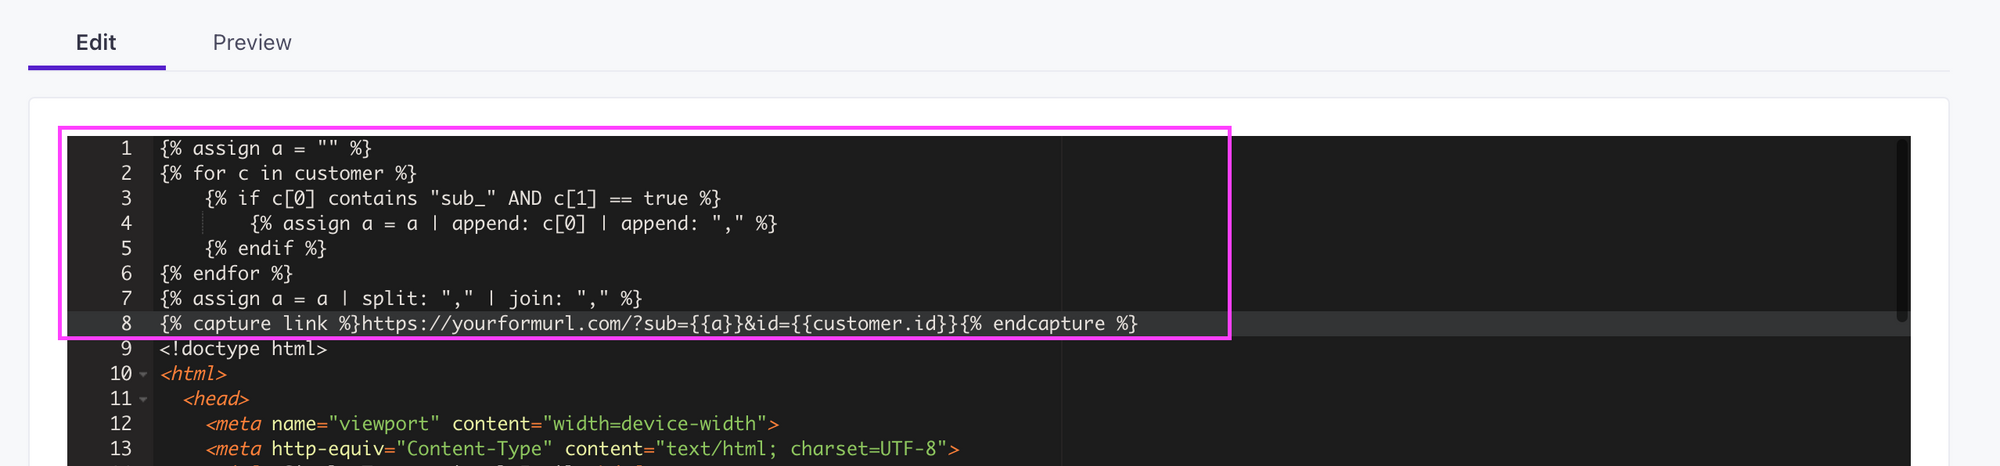
You can copy the Liquid from here...
{% assign a = "" %}
{% for c in customer %}
    {% if c[0] contains "sub_" AND c[1] == true %}
        {% assign a = a | append: c[0] | append: "," %}
    {% endif %}
{% endfor %}
{% assign a = a | split: "," | join: "," %}
{% capture link %}<https://yourformurl.com/?sub={{a}>}&id={{customer.id}}{% endcapture %}
In short, the Liquid is looking through all the customer's attributes for any that contain the sub_ prefix we defined earlier. Those are then added in a comma separated list in our form url. We're using the capture tag on line 8 to build a URL that contains Liquid.
In the footer of the Layout, we'll include a new link using the {{ link }} tag we created at the top of the message. It'll look something like this...
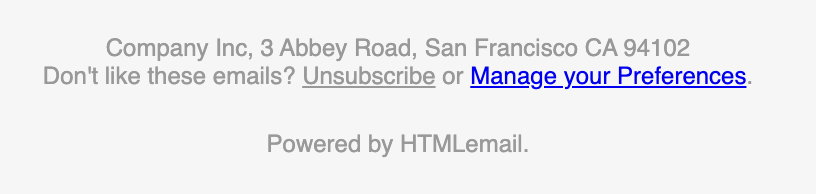
<br> Don't like these emails? <a href="<http://i.imgur.com/CScmqnj.gif>" style="text-decoration: underline; color: #999999; font-size: 12px; text-align: center;">Unsubscribe</a> or <a href="{{ link }}">Manage your Preferences</a>.
Now, in the Layout preview you can see our new "Manage your Preferences" link!