

A question we are often asked is how to personalize messages by including lists of items in the message, that can be of a variable length (like an itemized receipt of products ordered). The ability to iterate through lists is a powerful feature in Customer.io, and can be achieved using the Liquid for loop.
How to create a for loop
The Liquid syntax for writing a loop is:
{% for item in array %}
{{item}}
{% endfor %}
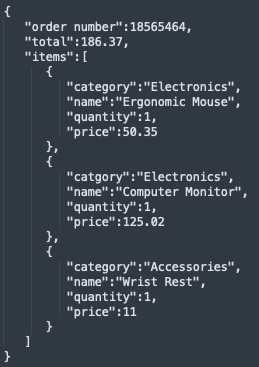
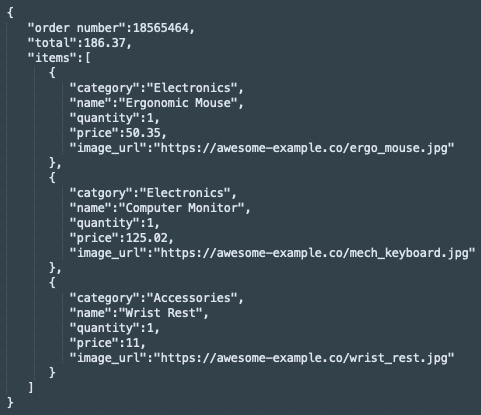
Let’s imagine we have a list of products on a customer’s receipt, formatted as JSON and sent to Customer.io from your system as an event attribute:
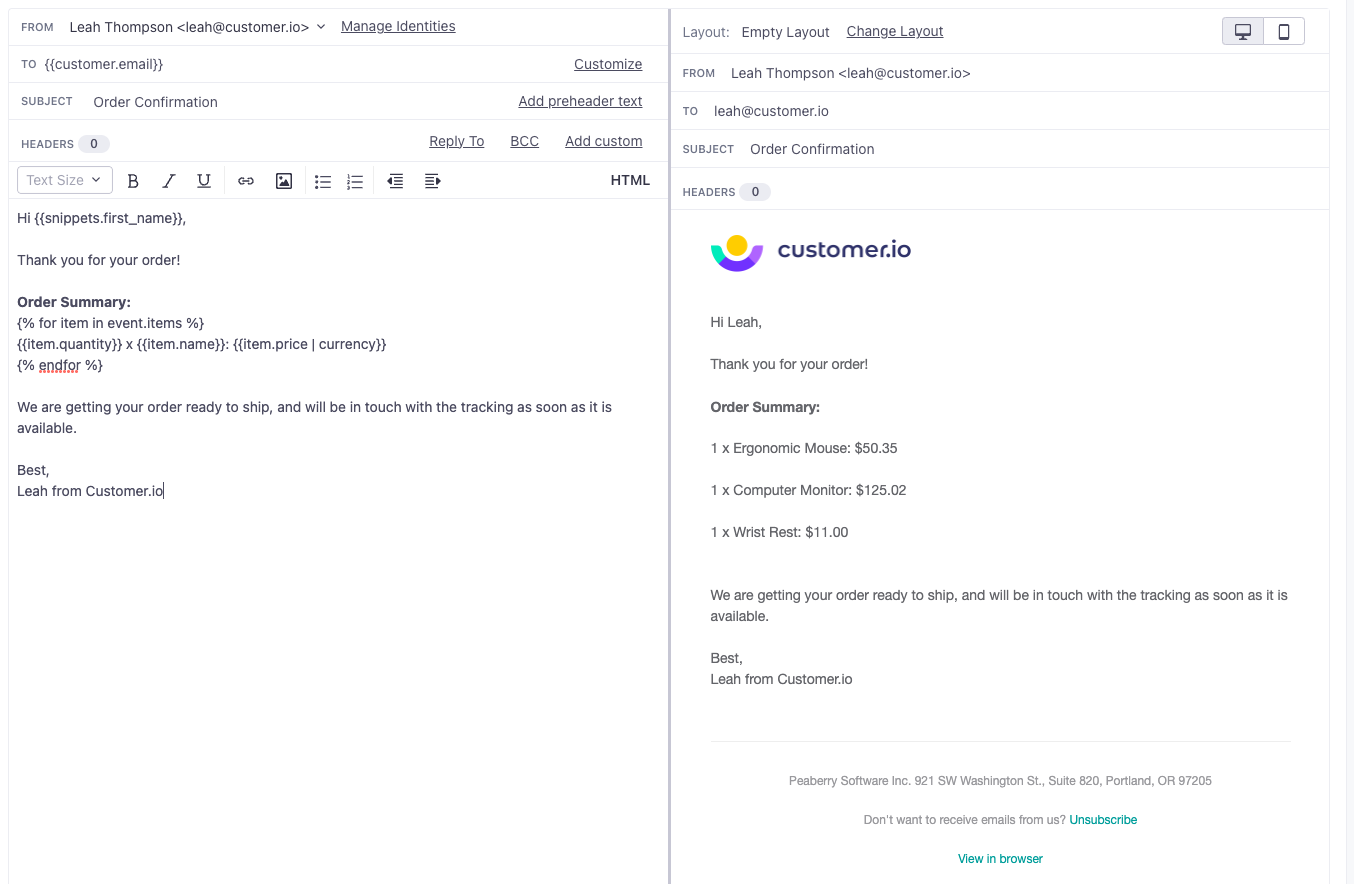
The Liquid to display information about each product in the Rich Text Editor could look like:
What does this Liquid actually mean?
Sometimes users can feel overwhelmed or uncomfortable with loops, so let’s break it down!
When we say “for item in array”, the word “item” can be replaced with any word you want - we recommend something meaningful that makes sense in the context of your use case! Like a “book” in a list of books, or a “product” in a list of products.
The for loop lets you move through a list, however long it is, until you reach the end. And each time through the loop, you can reference the data at the current place in the list - that is what “item” represents.
In a nutshell: the first time through the loop, the word “item” represents the ergonomic mouse, and is the same as referencing the Liquid {{event.items[0]}}. The second time through the loop, the word “item” represents the computer monitor, and is the same as referencing the Liquid {{event.items[1]}}, and so forth.
If you tried to reference your list of items in the {{event.items[0]}} format, you’d need to know how long the list is in order to know when to stop, which doesn’t work with variable list lengths - hence, the for loop!
The example looks pretty plain - can I create a dynamic number of table rows in my HTML?
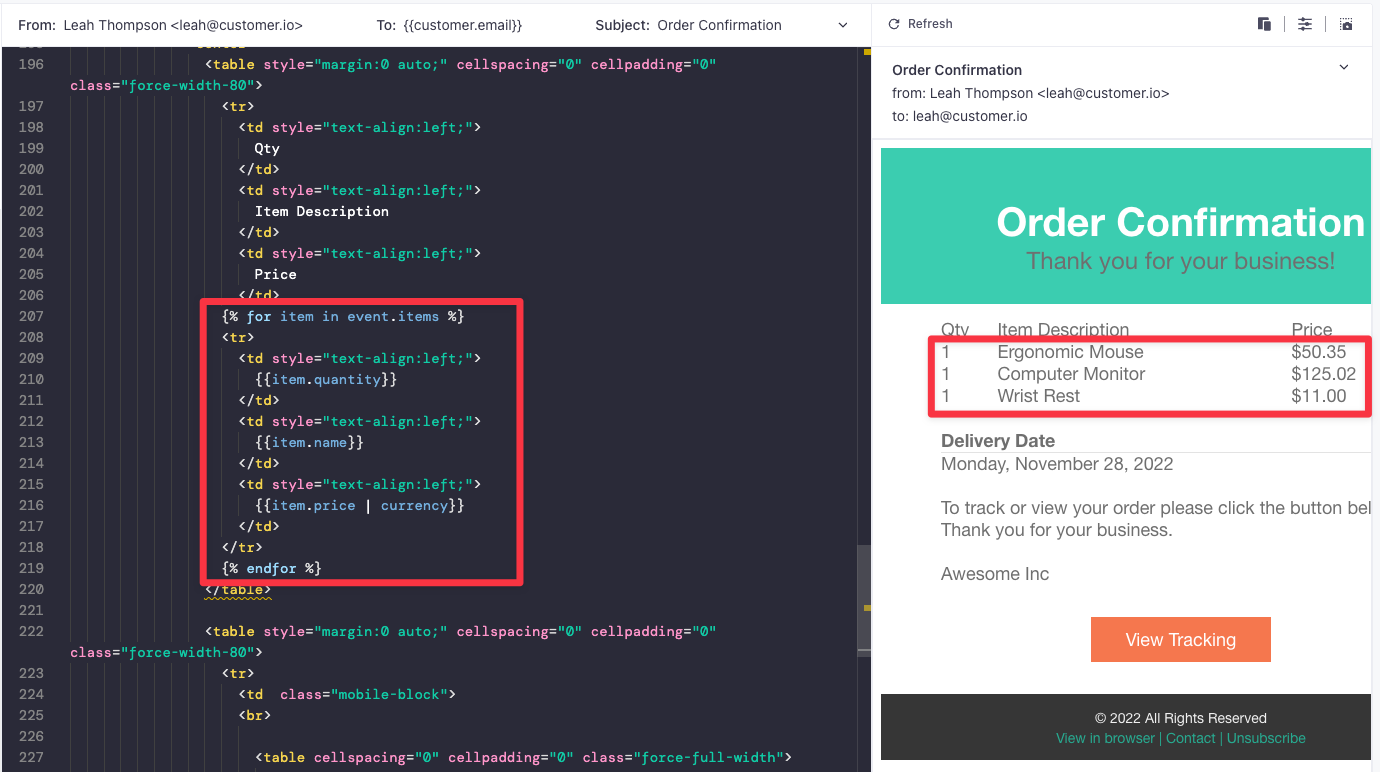
Yes! Liquid can also be added directly into the HTML code itself when using the HMTL Editor. If you are very careful with the placement of your <tr> and <td> tags in your for loop, you can have them generate each time you move through another list item in the loop, creating an unlimited number of rows!
An example could look like:
If I’m not a coder, can I also do this with the Drag and Drop Editor?
Yes you can! You have two options with a for loop in the Drag and Drop Editor:
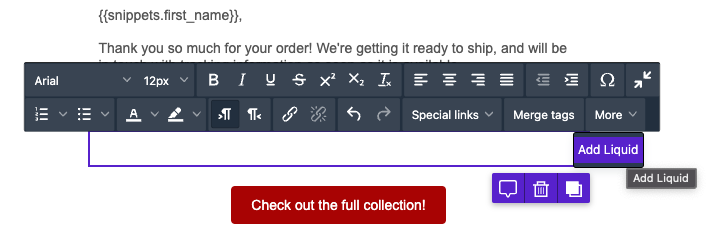
Option 1: Simply add the Liquid code to your message body (be sure to always use the Add Liquid function, or it might not behave as expected). This will output your list in plain text.
Note: be very careful with spacing while using Liquid, as adding extra line breaks or spaces in your Liquid will affect the preview! My personal recommendation is to initially type out your Liquid with line breaks and spacing so that it is very easy to read and troubleshoot, check your preview to ensure the correct information is being displayed, and then once you know it’s working go back to take the spacing away until the data is formatted the way you want it to look.
Here is the output in the Drag & Drop Editor:
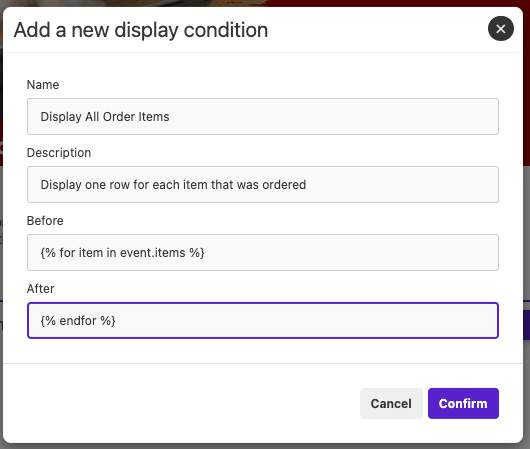
Option 2: If you want to get more advanced for a more engaging message design, you can also set up one row that will repeat for each item in the loop. Select the row that you want to repeat, and then under the “Rows” menu on the right, go to Display Condition > Add Condition.
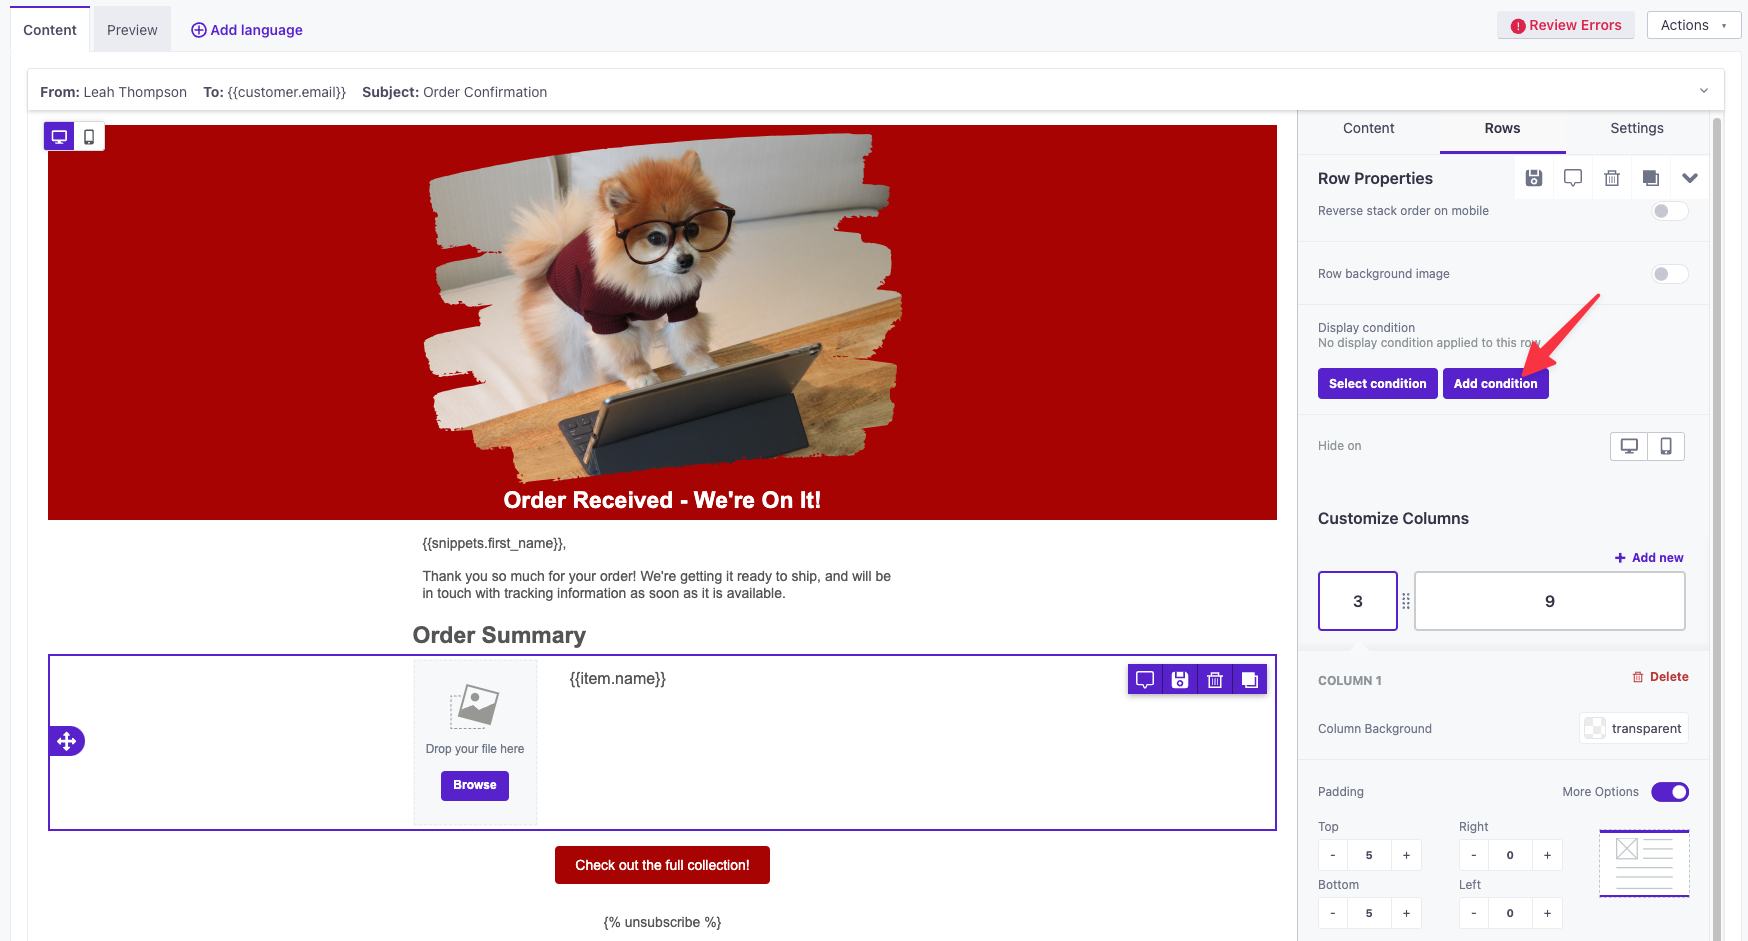
The opening tag of the for loop is displayed before the row, and the closing tag of the for loop is displayed after the row. By putting an entire row inside of the loop, the entire row will repeat.
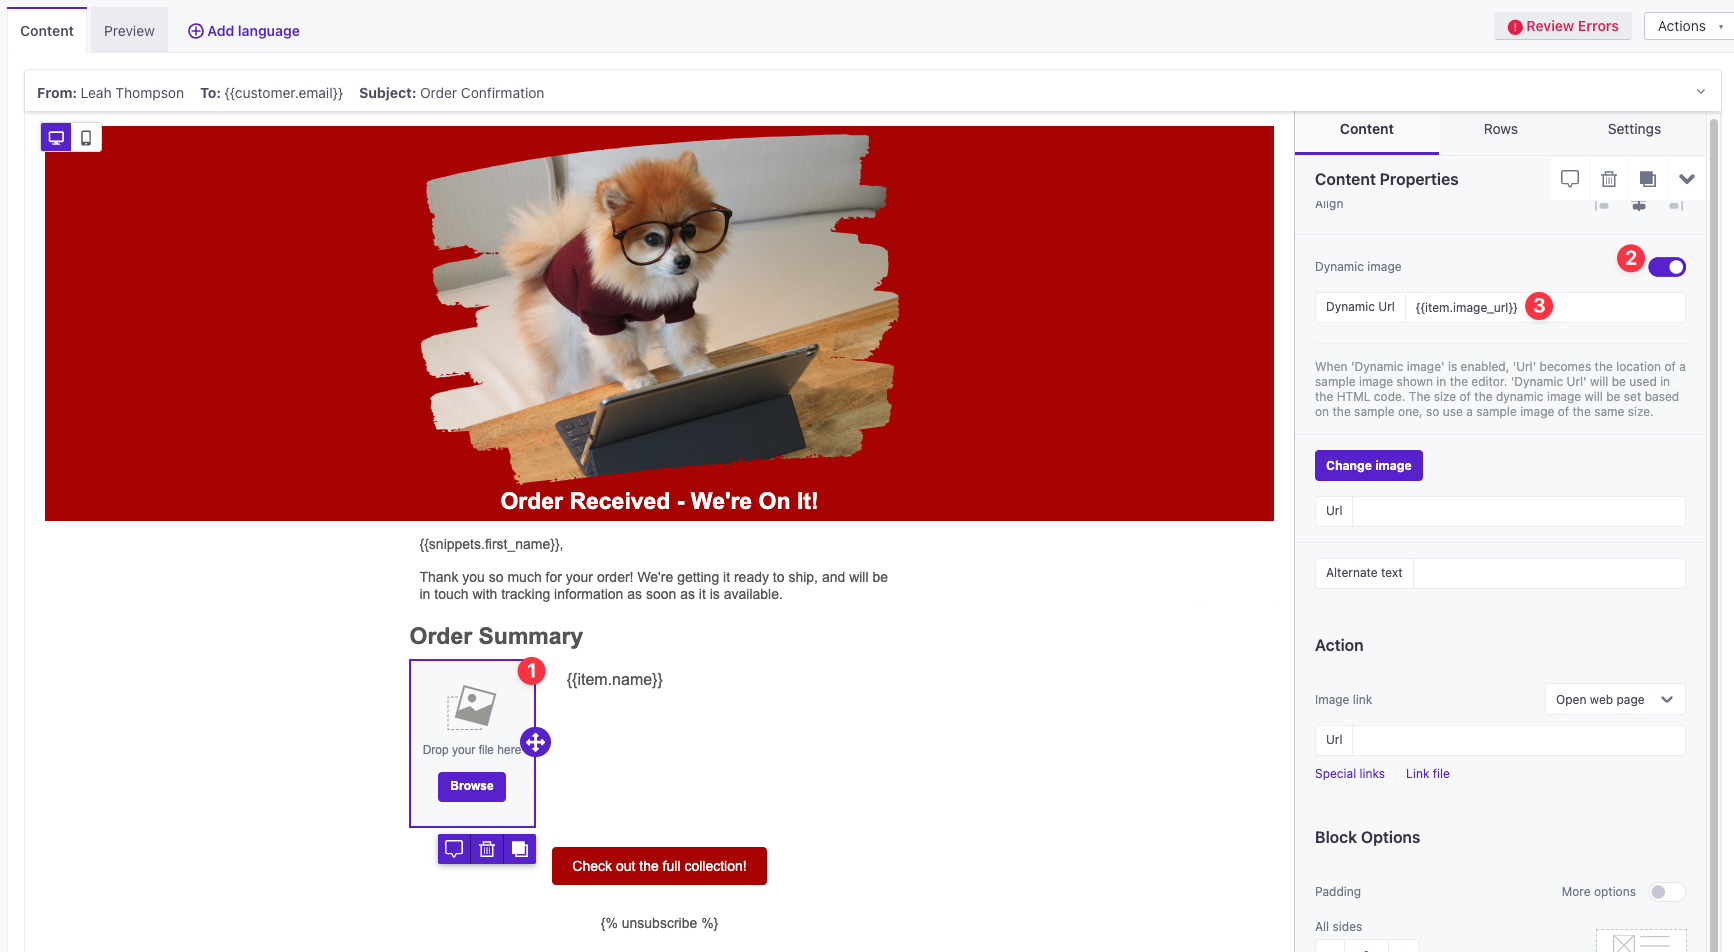
This functionality also works with images in Drag and Drop Editor. If you include the URL of the image in the event data, you can click on your image content and then under the “Content” menu on the right, turn on “Dynamic Image” and use Liquid to reference the image URL that you sent over in your event.
Event Example:
Turn on Dynamic Images (2) and use Liquid to reference the image URL that you sent over in your event (3).
For this example, you will need an image block for each item you want to display (1).
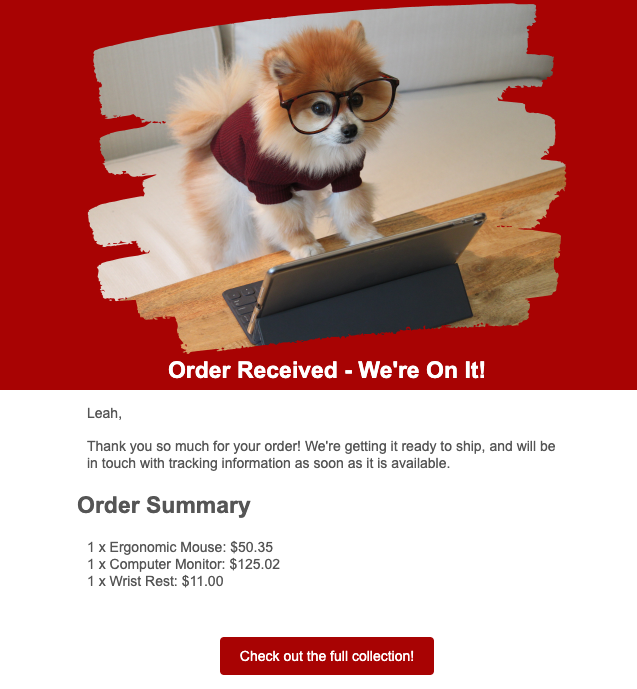
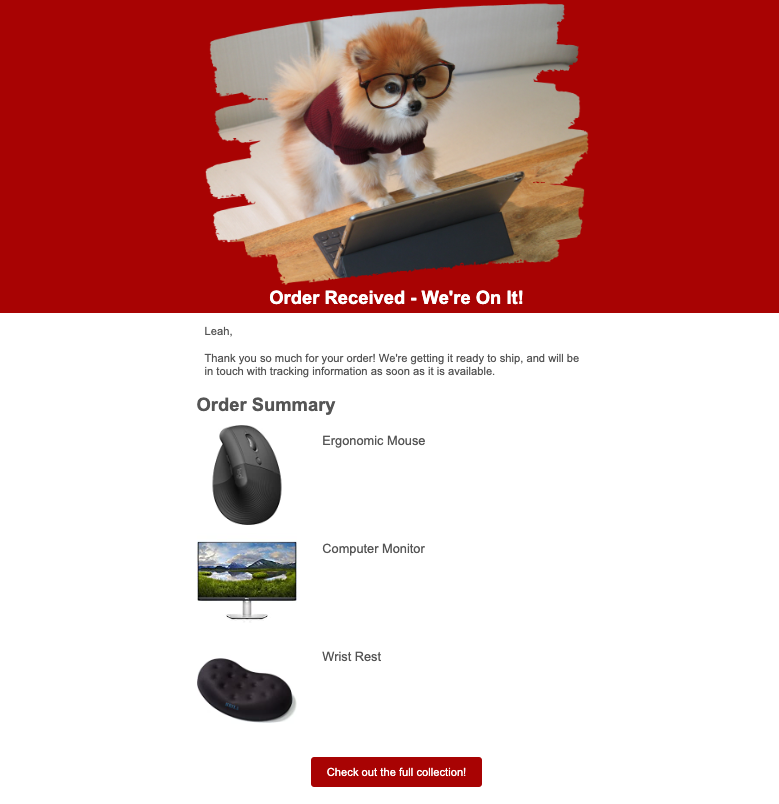
Here is what it could look like:
Hopefully this has sparked some ideas on how Liquid can help you further personalize your messaging.
Happy Automating!