

Sometimes you want to take specific actions when a customer replies to your email in addition to tracking when a customer opens your message or clicks on a link. The best next step in your flow might be to notify someone within the organization and/or remove that contact from the specific campaign so they don’t receive any more messages.
Here are two examples where popping a contact out of a workflow when a reply is received may be useful:
- Sales drip campaigns: A reply generally signals it’s time for automated emails to stop and personal 1:1 correspondence with the sales rep should take its place.
- Marketing campaigns: While marketing emails are more often focused on driving to landing pages, filling out forms, or completing some other type of conversion goal, a reply to a lifecycle campaign can be an indicator to stop sending automated messages and move to personal outreach.
Using a Mailto: Reply Link in Your Email
If your customers reply to you by clicking a Send Us an Email link vs. clicking the reply button to respond, you can use link tracking to capture their intent. Though by default Customer.io does not track mailto: links, you can override this behavior with a bit of Liquid.
In this case, we just replace the URL with the mailto: link and email address so that it looks something like this:
{% cio_link url:'mailto:email@domain.com' track: true url_params: false %}
Note, since this link will not drive to a web page there is not need to add url parameters, thus we specify the url_params as false. The link will open a new message in your recipient’s email editor of choice .
⚠️ Just because somebody clicked your reply link does not necessarily mean that they followed through to send a message. Also, customers can respond by clicking the reply button within their email app. Read on if you want to handle these scenarios in Customer.io.
Notifying Customer.io When a Reply is Received
To capture reply notifications and take appropriate action, you’ll need to:
- Inventory your tech stack to identify the options for notifying Customer.io of the reply.
- Setup a webhook, Zapier zap (or similar), or Track API call to send reply information from your inbox provider to Customer.io
- Use a combination of filter segments, goals, exit conditions, and/or action conditions to control how certain types of replies should be treated.
Putting Together the Tech Stack
Since Customer.io does not have a way to listen for replies directly, it relies on getting reply notifications from other inbox providers like Gmail, Help Scout, or Zendesk. Don’t worry if your organization doesn’t use one of these solutions, the methods provided below can apply to a myriad of inbox tools.
To figure out the best way to handle your replies, you’ll first want to sleuth out:
- The email address that is/should receive these replies (individual or group email address).
- The inbox provider where replies will land, e.g., Gmail or Front.
- What webhook or Zapier integration capabilities the inbox provides.
Example Setups
Using a Group Mailbox Solution
Using a shared or support mailbox to manage replies can simplify the process of sending reply notifications to Customer.io. Examples of shared inboxes include Help Scout, Zendesk, and Front.
- Zendesk and Front - Provide webhook actions in their workflows/rules. Thus, when a new ticket/conversation meets specific criteria - e.g., matches the subject line - the workflow/rule can fire a webhook to trigger a Customer.io Data Campaign. This Data campaign can then fire an event or update an attribute for the Profile that responded.
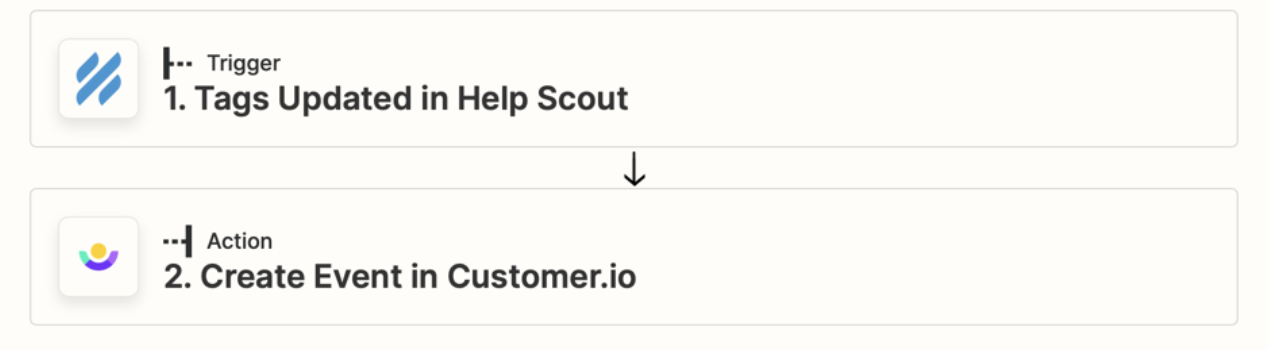
- Help Scout - The best solution here is to use Zapier, triggering the Zap from Help Scout when either a specific tag is applied to the incoming reply or based on assigning the conversation/ticket to a Team (Plus plan) created and dedicated to managing these Customer.io campaign replies.
Help Scout workflows can handle these scenarios, matching on the to: field and/or the subject line before applying the appropriate tag or assigning the conversation to the dedicated Team to trigger the Zap. In this case, Zapier can directly create the Customer.io profile event or update an attribute.
🚧 Note, while Help Scout does have webhooks, they execute globally, e.g. for every conversation assigned action in Help Scout. Thus, Customer.io could potentially receive a large number of webhooks, the majority of which are irrelevant.
Gmail
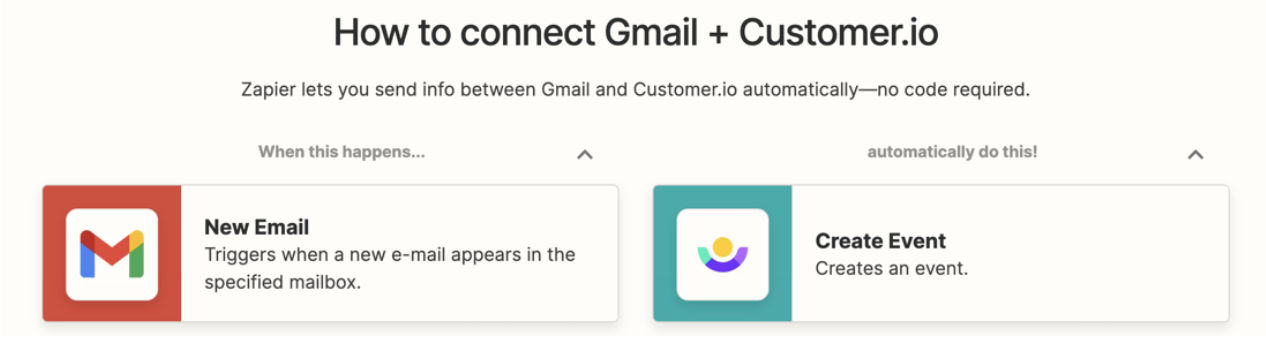
Gmail (or other) personal/group mailboxes will also require Zapier as a middleman unless they provide webhook capabilities.
For Gmail, the process can be built as follows:
- Create a new email address that will be used as the replyto: of the Customer.io emails. Limit the types of email replies going to this address to filter what actually ends up triggering a Zap.*
- Set up the Zap to trigger when this email address receives a new email/reply.
- The Zap can then send a new event into Customer.io indicating a reply was received.
*You can further limit which emails trigger the Zap by choosing the New Email Matching Search trigger event instead of New Email. In this case, you can choose to filter based on Gmail criteria like subject line contents, the to: field, etc.
Exiting the Campaign When a Reply is Received
Now that you’ve got your inbox notifying Customer.io that a reply was received, it’s time to set up your workflows to act on that information and pop that profile out of the campaign.
Using a Data Campaign to Catch a Webhook
If you’re receiving notification of the reply via a webhook, a Data Campaign will be the first mandatory step in Customer.io. The Data Campaign catches the webhook and repurposes the payload to either create a new Event or update an attribute on the replying profile.

Receiving an Event or Attribute Update
There’s no need to use a Data Campaign if you are sending in the reply notification directly as a new Event or attribute update via Zapier or by using the Customer.io Track API call.
Building the Logic into Your Drip Campaign
Once you’ve got the information coming into Customer.io, it’s time to decide how to treat the contact moving through your campaign. Alternatives include:
- Setting a goal and exit criteria based on the replied event. Use this when your conversion goal is the reply. The profile will exit the workflow when it’s time to send the next message.
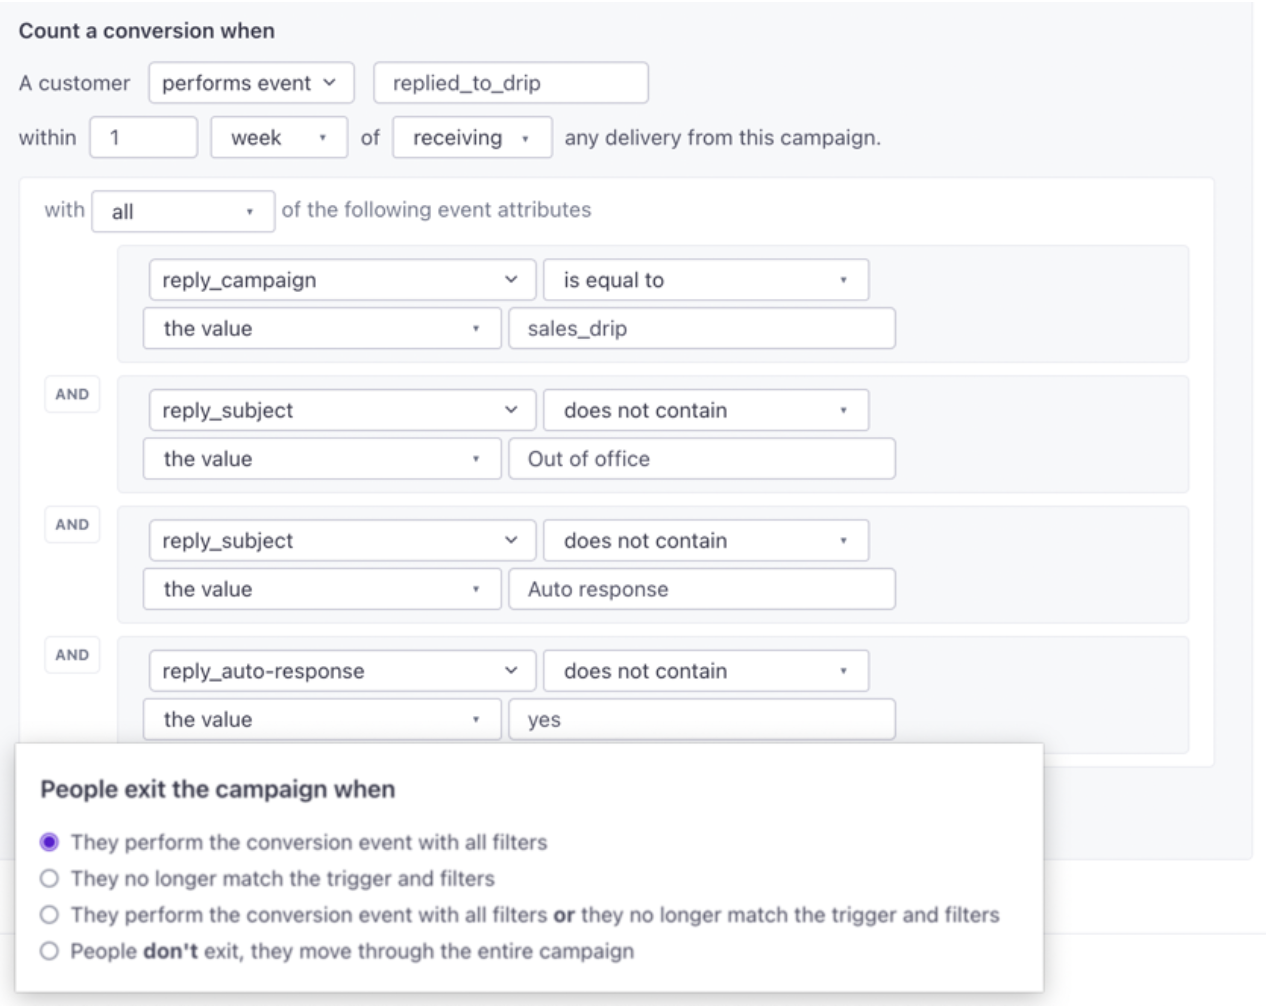
💡 Pro tip: Your goals and filter segments should do their best to filter out things like out of office auto replies that do not qualify as a proper reply, especially when it comes to goal conversions.
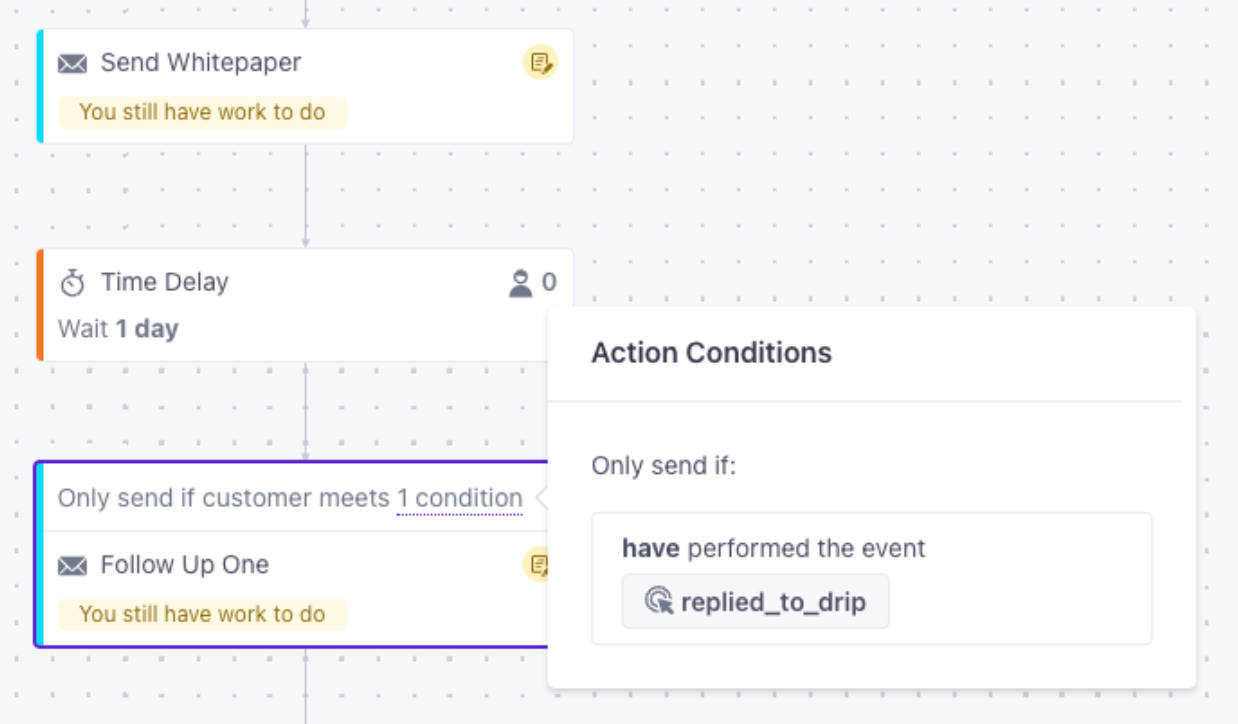
- Skipping any further messages in the campaign. Use Action Conditions to skip selected messages if there are other actions that you want to execute in the workflow before the profile exits. For example, you may want to send a message to Slack that a reply was received. In this case, the reply will not be your exit condition but may or may not be your conversion goal.
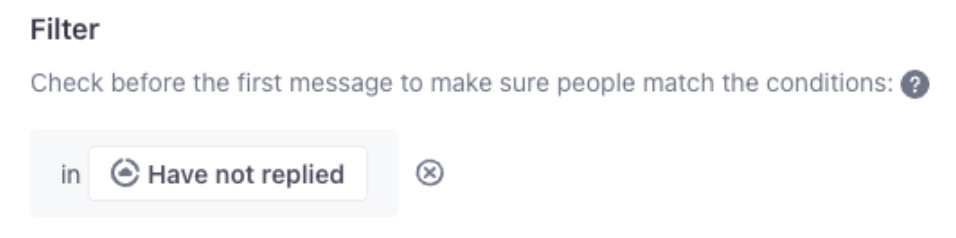
- Create a filter segment. Filters work as a confirmation step to make sure the right people stay in your campaign workflow to receive the intended messages. In this case, you can define a segment that includes only people who have not replied to your drip campaign and add that as a filter to your drip/automation campaign Trigger.
Should somebody reply to an email from the campaign, they’ll drop out of the segment and thus exit your campaign.
Weeding Out Responses That Should Not Be Considered Conversions
Sometimes responses will arrive that are more akin to please stop 🛑 sending me emails! than yes, I’d like the learn more. 😄 In this case, you definitely want to opt the person out but not necessarily count it as a goal conversion.
One best practice is to include a more highly visible opt-out button or link in your drip campaign above the obligatory unsubscribe link. This gives your prospects and customers an easy off-ramp without muddying up your conversion metrics or globally unsubscribing from all your emails.
Adding a campaign opt-out option is a straightforward process of:
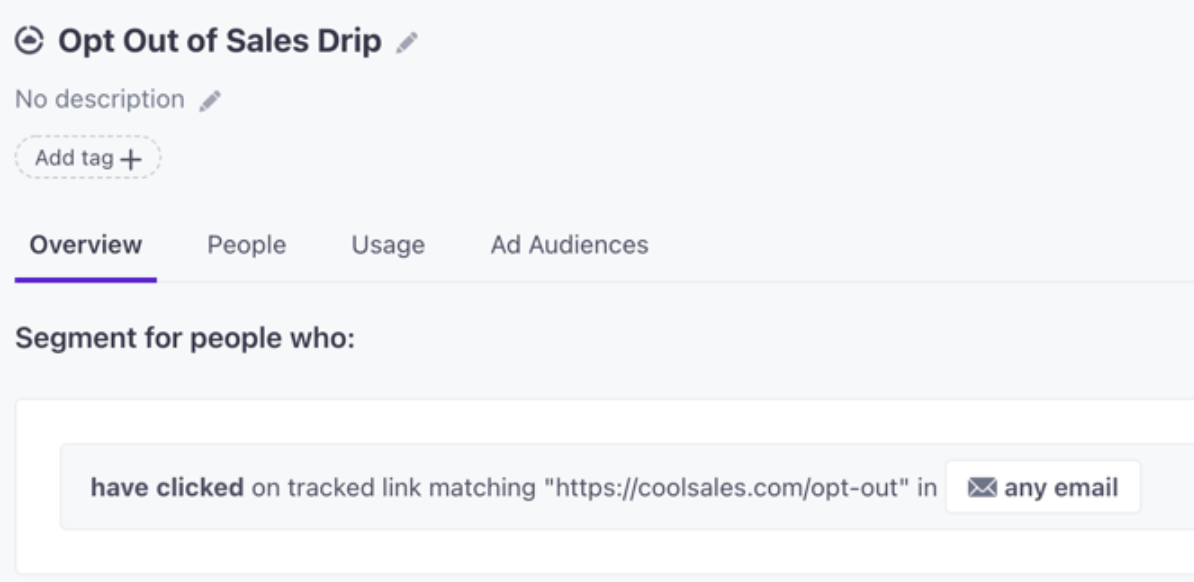
- Add a link/button to each email with tracked links with some text like unsubscribe me from these emails or I no longer wish to receive onboarding emails. Point the tracked links to a landing page confirming they’ve opted out of this particular campaign.
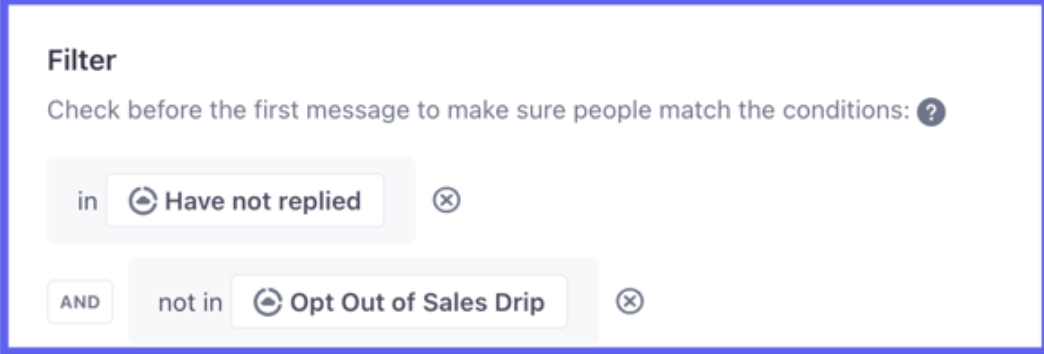
- Create a segment to capture all those who have clicked this link in any of the emails in this campaign.
- Add this segment as a filter to your campaign.
Summary
Following the recommendations above you can track your email replies and use this information to take appropriate action, whether that’s removing customers from the campaign, updating their profiles, or sending an internal notification.
Let us know - what use cases do you have for tracking replies?